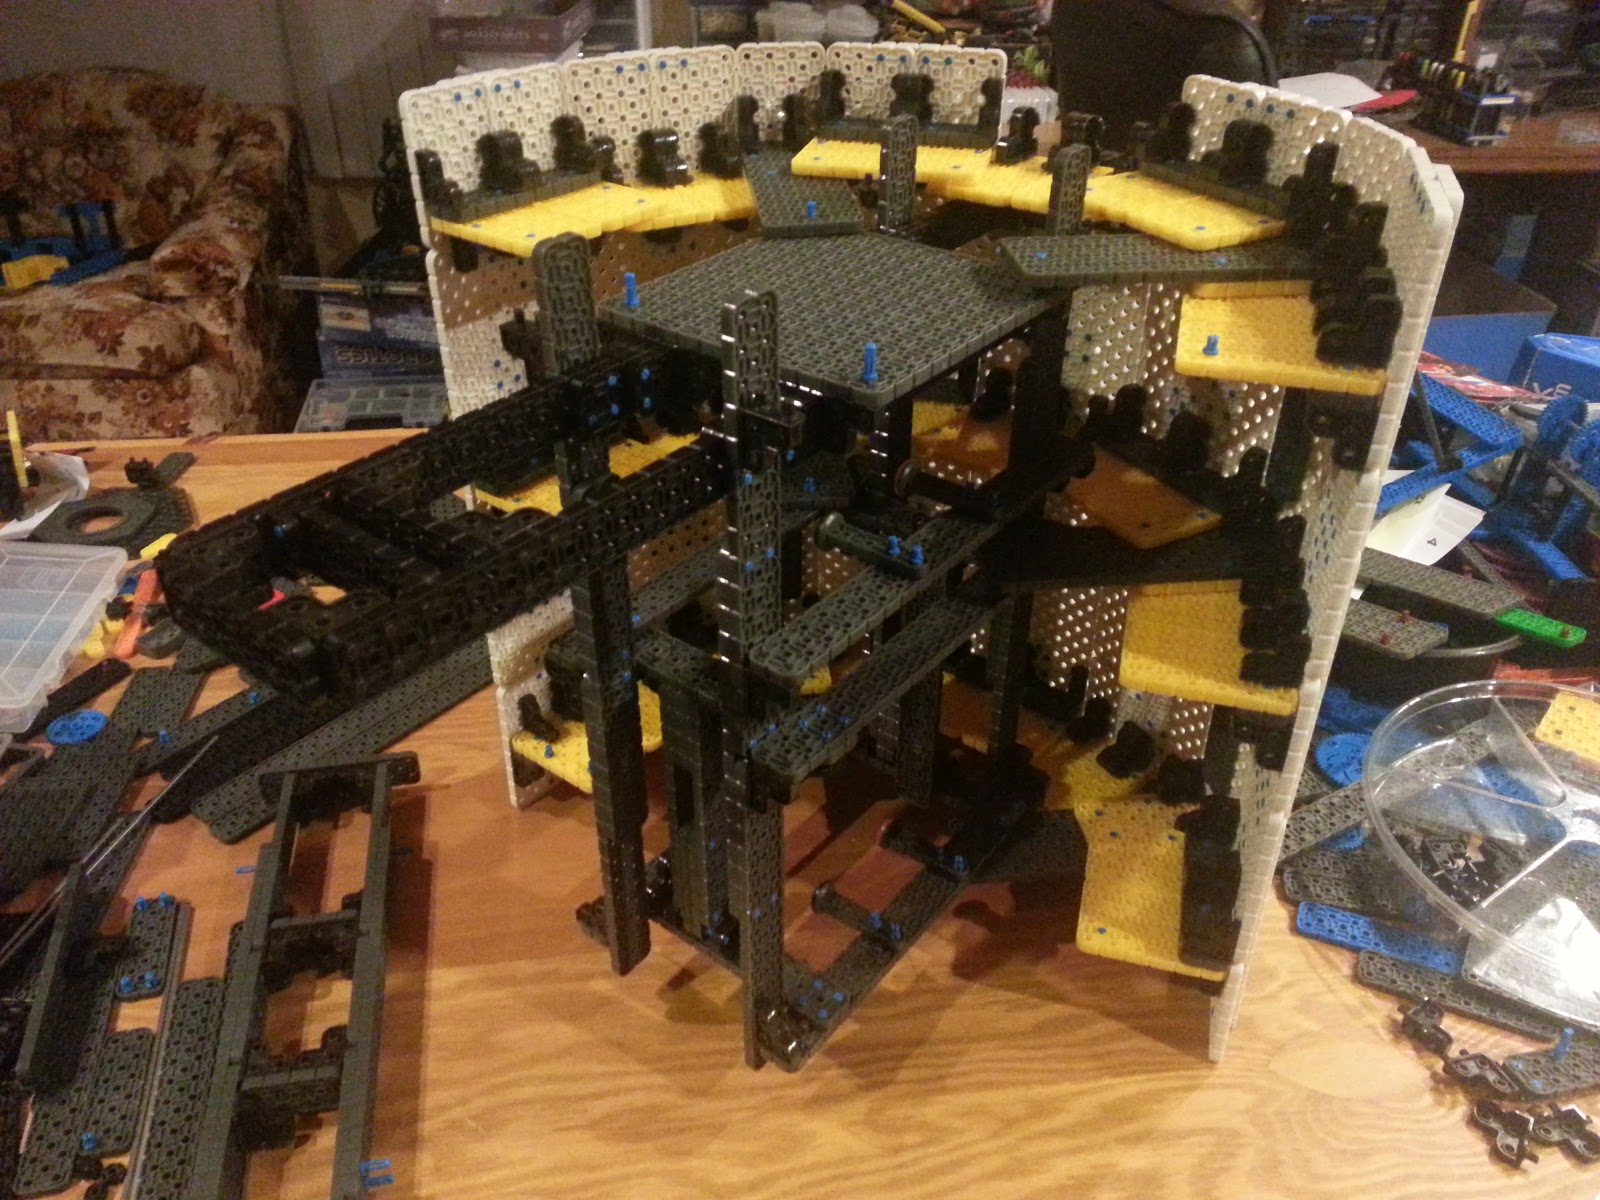
Monday, November 30, 2015

R2-IQ: Rolling on three legs

Build Day 34:

Here's the next test of the robot rolling.

I don't want the ankles on the outside legs to bend.  It will only use the 2nd set of wheels when it's in 2-leg mode.

Also, I already changed the third leg, so it looks like it's flat on the ground.


It does a good job of rolling around, until I try to switch back to 2 leg mode, and I don't stop when it gets a bit off balance (one drive wheel off the ground).

I did find a couple weak spots that needed to be tightened!

R2-IQ: New Shoulders

Build Day 33:

Shoulder V3
I started the day with version 3 of the shoulder.  The problem is that it will twist when the legs move back (3 leg mode). In this version, there is a bit less twist, but it was very tough to build the body around it.  I ended up with several "odd" distances, and "even" length pieces, so it would not easily fit.
Many pins in V4
After fighting with it for a while, I decided to create yet another version of the shoulders.

My plan was to make a very solid piece that could not twist.  It would have lots of pins.
Shoulder V4
This version would also be better designed to fit into the skin of the body, creating a more solid structure.

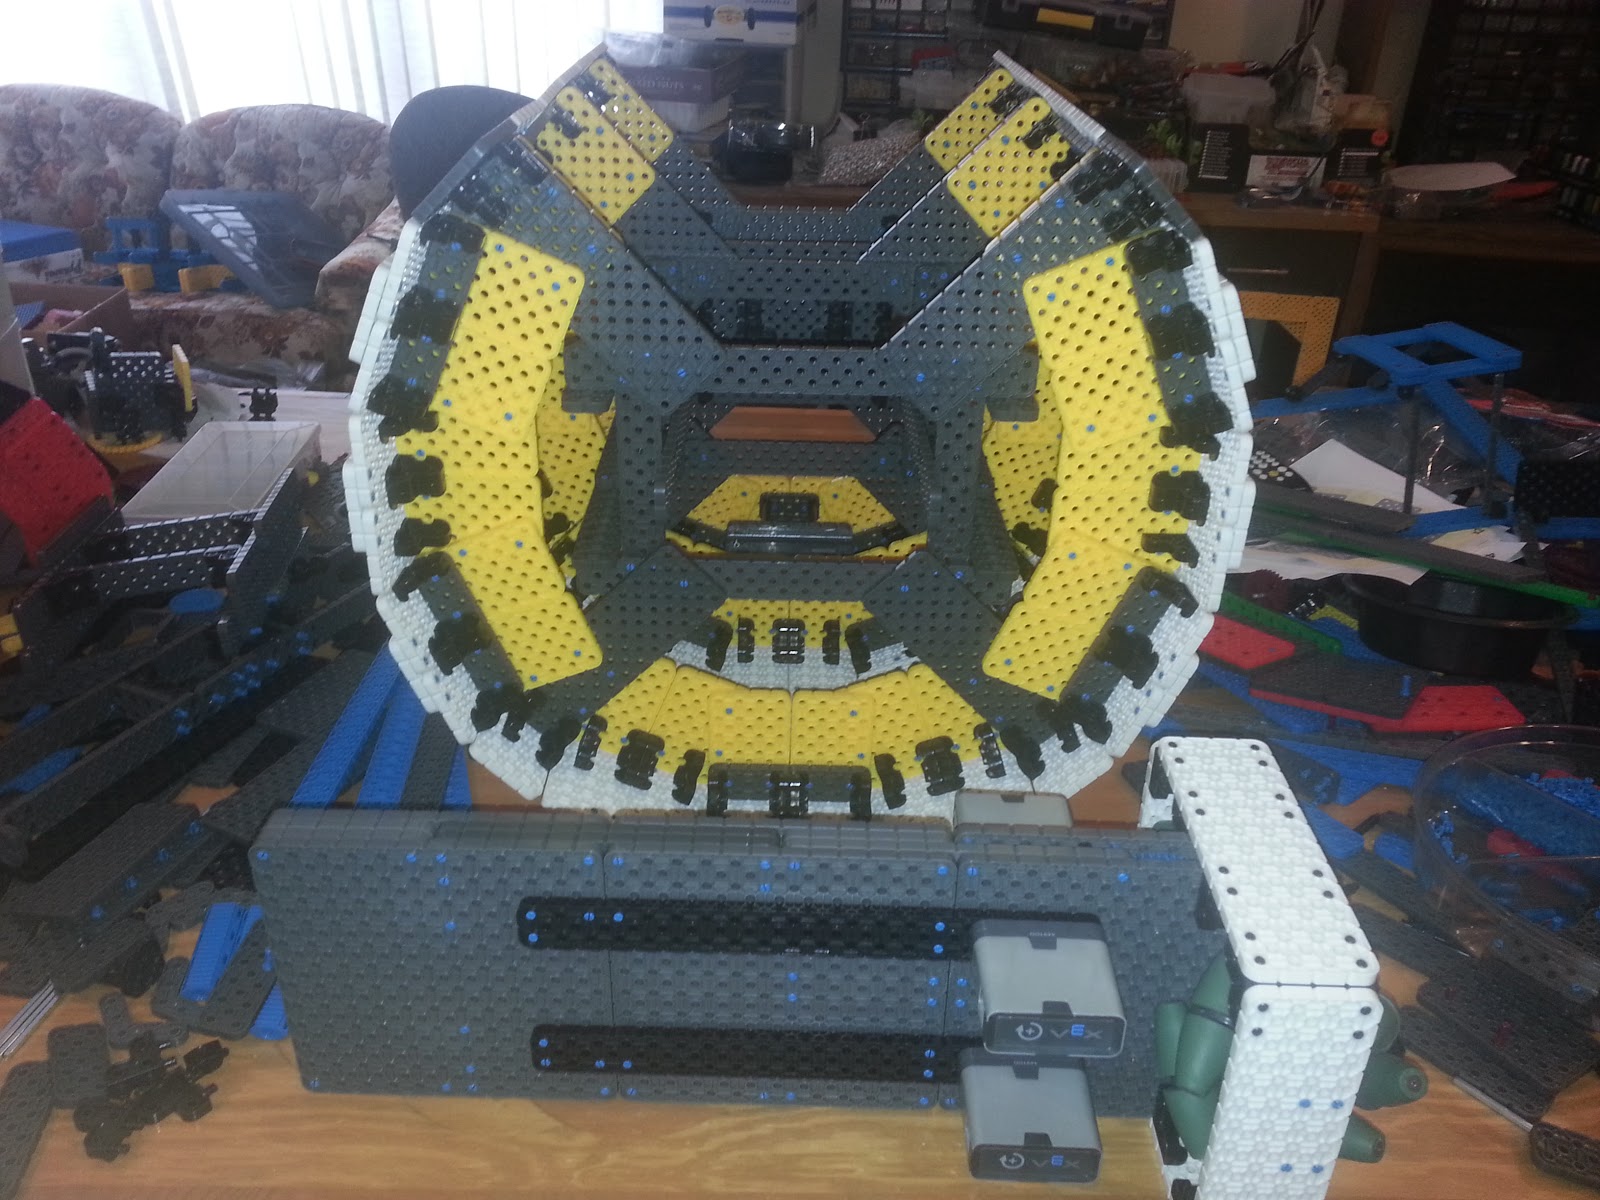
Modified Body to secure shoulders
The top ring in the body had to be rebuilt, to sit on top of the shoulders, and also add support to the rest of the skin/body.
Solid body
Final cut-away, before adding the front skin panel.
Not-so-solid head.  (prototype)
When driving, I sometimes get a little aggressive.  The outside legs currently don't have anything to hold them in place.

During this crash, the body held up pretty well, but the head did not survive.  That's OK, it was still just a prototype.

R2-IQ: New Frame

 Build Day 32:

New Frame ready for install
 I built a new frame to hold the third leg.  On this day, I would destroy the old frame, and mostly take apart the old body to wrap it around the new frame.

Bryan came over to build a better looking leg.  I told him it looks great.  No pictures.


Body with new frame

Crack open the body

Body parts all over the place


R2-IQ: Progress Slowing

Build Day 31:

New frame to work with new wheel
This is where progress really seems to slow down.  Ignoring the fact that it was Thanksgiving (and I did spend time with my family) I don't feel like I got much done.

I built a new center wheel.  It won't fit into the current frame, so I'll have to rebuild that.

The new frame has new, stronger shoulders.

New center wheel assembly

Tuesday, November 24, 2015

R2-IQ: Broken

Build Day 28:

Bent Axle
Over the weekend, while I was driving R2 around the show, it would turn to the right, but not to the left.  When I would try to turn left, the chain would jump on the gears on the center leg.  I didn't really understand why it worked one direction, but not the other.

Last night I decided to replace the chain with gears, and while rebuilding the wheel, I discovered one of the axles was very bent, causing the wheel to turn poorly.

Hopefully, I'll get the leg rebuilt (new design) and attached, tonight.

Monday, November 23, 2015

R2-IQ: First Show

Build Day 27:

R2-IQ at it's first show
Over the weekend, we attended Brickworld, a large show with lots of cool displays.  R2 spent the time surrounded by lots of LEGO Star Wars items.

Unfortunately, that didn't allow me any time to get any real work done on him.

However, it was a very good indication of how people will react to the droid.  I had several kids want to touch it, and even hug it.

I'm looking forward to making more progress in the coming weeks.

Thursday, November 19, 2015

R2-IQ: All coming together

Build Day 23:

Frame & Body, separate
I had a very productive night last night.  I started by rebuilding the shoulders to support all three legs.

With the new shoulders, the legs have a hard-stop at 0 degrees swinging forward (standing on two legs) and at 36 degrees swinging backward (standing on 3 legs)

I tried using magnets to hold the third leg in place, but that didn't work.  It's too heavy.

I had to split the body into four pieces to insert the frame.

1/2 body

Frame with 1/2 body attached

Frame with 3/4 body

Adding last section of body

Body with shoulder(s)

Frame inside body

R2 with head & 2 legs

R2 in 3 leg mode

Playing with color

More color 

Tuesday, November 17, 2015

R2-IQ: Head Start

Build Day 21:

Here's a first look at the head.  At this point, it looks more like a helmet.  Hopefully, I can make it look round, using square parts.

Monday, November 16, 2015

R2-IQ: 2-3-2


Build Day 20:

One of my favorite parts of this build will be R2's ability to transform between 2 legs and 3 legs and back to 2 legs.  It will not be done with actuators in the shoulders, but by using the motors in the feet.

Here are a couple pictures from my first test.  In this prototype, the third leg can not raise up into the body, but it will in the final version.

Leah adding a Duplo block to the robot

(I'm not very happy with the blog formatting options around videos)

The video shows my first trial run, switching from 2-3-2.  Right now, the shoulders are not very sturdy, and I'll need some work around how the legs move...  but it's a start.

Friday, November 13, 2015

VEX IQ Angles

VEX Angles

Creating a 22.62 degree angle
While building R2-IQ, I found the need to create different angles.  One way to do that is to connect two plates together with pins in various locations.

Using the red and gray plates pictured here with 1 blue pin and 4 yellow pins (pins shown twice, once in each plate) will create a 22.62 degree angle.  Both plates are pictured from above; do not flip them when assembling.

Below is a chart showing different angles that can be created, by leaving the blue pin in the same location and moving the yellow pins to other locations.
22.51234
distance00.511.522.53
10XX
0.590.00143.13157.38
2190.00126.87143.13
1.536.8790.00118.07
3253.1390.00112.62
2.522.6261.9390.00
4336.8767.3890.00
3.516.2646.4071.08
5428.0753.1373.74
4.512.6836.8758.11
6522.6243.6061.93
5.510.3930.5148.89
7618.9236.8753.13
6.58.8025.9942.08
8716.2631.8946.40
7.57.6322.6236.87
9814.2528.0741.11
8.56.7320.0232.78
10912.6825.0636.87
9.56.0317.9529.49
111011.4222.6233.40
10.55.4516.2626.78
121110.3920.6130.51

Thursday, November 12, 2015

R2-IQ: Part Count

Build Day 16: Parts

Short pin
I often try to keep track of parts as I'm building these big projects.  And I usually fail.  After the build, it's possible to calculate with reasonable accuracy how many beams and other parts were used.  But, it can be pretty tough to count pins and connectors.

On this build, I'm actually tracking the number of pin bags that I've opened (current 7 bags which have 120 short pins) so I should have a pretty good number for pins.
90 deg Angle Connector
Through a quirk of fate, I also have a very large quantity of this 90 degree angle connector.  

If you know me, you'll know why I rather like this connector.

So, I have an insane number of these connectors.  They come in bags of 32, and so far I've used 18 bags on the R2 build. (576 connectors)  I expect that number will go up 2 or 3x  when I'm done.

Wednesday, November 11, 2015

R2-IQ: Adding more support

Build Day 15:

Adding a third rib into the middle of the body was more difficult than creating the body with the other two ribs in the first place.  However, with it in place, the body is pretty rigid.

I will be adding enough internal support to connect the three legs together.


R2 Standing on 3 legs.
The next task will be to calculate the leg lengths and ensure the body is oriented correctly.

My first test-stand-up looks bad.  But we'll get it figured out.

Monday, November 9, 2015

R2-IQ: Extra Pictures

Build Day 13:

I have a couple extra pictures from over the weekend.

18 degrees

First, I was trying to figure out how to make an 18 degree angle.  In order to find the exact combination, I opened SnapCAD and changed the rotation angle on the grid to 18 degrees.  Then I put in two plates, and rotated the second one once (18 degrees).  I was able to line up the corner holes, and see which other holes lined up.

"Why?", you ask.  When R2 is in 3-leg mode, the body and legs are both tilted to 18 degrees.  So, the ankles will need to be solid at 18 degrees.


Powered caster wheel.

The front wheel (3rd leg) is going to a fancy powered wheel.  It will be a "Mecanum" wheel which, along with a second wheel, and multiple motors, will allow the front wheel to drive in any direction, making it a powered caster wheel.  (the picture shows two copies of the front wheel assembly.  The actual robot will only have one)

This will help to overcome a common problem with many R2D2 builds, where there is too much weight on the non-powered front wheel.

While these wheels are not available for VEX IQ competition robots, they are part of the VEX line, and do easily fit on the same axle as normal VEX IQ parts.

In the background, you can see the mockup of the foot that I made, to ensure the size is appropriate.

Sunday, November 8, 2015

R2-IQ: Movement

Build Day 12:

Over the weekend, I made up some legs and feet.  They are by no means the final legs, but I have the length, and some test feet.  It appears to be pretty stable.
Here's one of my first attempts to move the body. via remote control.  I let it get too fast...
And a longer video of the body moving around in 2 leg mode. 

When it's complete, it will normally have three feet on the ground when it drives.  But it looks like it will be pretty stable standing and possibly moving when in 2-leg mode.


Thursday, November 5, 2015

R2-IQ: Complete Body

Build Day 9:

I built the skin of the body last night.  I will have to build a bit of frame to connect the arms and 3rd leg together, but the inside will be mostly empty.

I used a large number of yellow pieces left over from Qonnect 4 and a lot of 90 degree connectors, to make the round shape.  It looks pretty good, but will still need plenty of decoration.

In my shipment, I received 12 packs of pins.  I've already opened six of them.  Not sure if I will need to order more, but my guess is that I will.

The whole body is very light.  I'm easily able to lift it with one hand.

I made a mockup of the leg to see exactly how it would fit, and the size.  It's looking pretty good.


Wednesday, November 4, 2015

R2-IQ: 1/4 Body

Build Day 8:

Normally, with a project like this I tend to keep them under wraps until the big reveal.  That protects me, in case it fails.  With this one, I'm trying to post progress as it happens.

So far, so good.

Last night (after coaching the middle school robotics team and Kurt's soccer team) I built 1/4 of the body.  I expect to have the whole body skin, with no features, built tonight.


Tuesday, November 3, 2015

R2-IQ: Parts Received

Build Day 7:

I received two boxes of parts today for my R2-IQ build.  One was 11 lbs, and the other was 22 lbs.  

After a bit of sorting and counting, I verified that the shipment included everything I was expecting.

The only real new parts (for me) are the Mecanum wheels, which I plan to use as the main drive wheel[s] on the front (third) leg.  Hopefully, with two opposite-direction wheels mounted together, it should act like a powered caster wheel that can drive any direction.  I still have to work out the exact size of the feet/wheels. 

Tonight I'll start snapping panels together and get a mockup of the body and really start to see how it will look.

Monday, November 2, 2015

R2-IQ: Some real building

R2-IQ Day 6:

I spent some time over the weekend building with actual plastic parts.  So far I'm trying to see how to build the body and head, without using so many parts the whole thing can't be lifted.

I don't yet have a good idea how much this will weigh.  My first shipment of parts (which I thought would include everything) is only 2 boxes, and weighs just under 11 lbs.

That can't be right.  I must have missed something.  This is my first parts list.  I'm planning on using a few items I already have.  Will it be enough?

QuantityPart NumberDescription
1228-2500Super Kit
1276-14474" Mecanum Wheel (4-pack)
30228-38714x Plate Foundation Add-On Pack (White)
10228-35154x Plate Foundation Add-On Pack (base)
10228-37184x Plate Foundation Add-On Pack (Blue)
4228-36954x Plate Base Pack (Blue)
2228-38652x Beam Base Pack (White)
1228-2532Gear Add-On Kit
1228-4420Long Shaft Add-On Pack
1228-3057Shaft Add-On Kit
1228-2523Wheel Add-On Kit
1228-2534Chain & Sprocket Kit (Base)
1228-4415Large Plate Add-On Pack (Base)
10228-3058Connector Pin Pack (Base)
4228-2560Smart Motor
4228-4034Smart Motor Mount Add-On Pack
1228-4422Long Smart Cable (8-pack)


Head and body shape 


Here are a couple actual builds of the head and body shape.  I think it will look pretty good once it's complete and covered with white and blue...

Pieces of the robot


There are many separate parts to this project, that will all need to be combined for it to be complete.  This list will help me think through everything.

  1. Body
    1. Internal structure
  2. Head
    1. Head Movement
  3. Arms (2x)
    1. Stationary setup
    2. Shoulders
    3. Shoulder sensors to detect orientation
  4. 3rd Leg
    1. Raise & lower
  5. Motor layout for navigation
  6. Navigation software (remote and other control)
  7. Lights & Sounds
    1. Basic lights
    2. Advanced Lights & Sounds (alternate processor?)
  8. Extra compartments
    1. Magnets to hold doors closed